

How to Properly Clean a Laptop Motherboard from Liquid Spills
Liquid spills on a laptop can be a nightmare, potentially damaging critical components like the motherboard. Whether it’s water, coffee, or soda, quick and careful action is essential to prevent permanent damage. This guide, brought to you by experts at Ltech UK, provides a step-by-step process to safely clean a laptop motherboard after a spill, ensuring your device has the best chance of recovery. By following these instructions, you can minimize risks and restore functionality, saving you from costly repairs or replacements.
Immediate Steps After a Liquid Spill
Time is critical when liquid meets electronics. Acting fast can make the difference between a functioning laptop and a costly repair. For instance, if you notice issues like the aspire 3 touchpad not working after a spill, it could indicate liquid damage affecting the motherboard or connected components. Therefore, follow these immediate steps to limit damage:
- Power off the laptop: Press and hold the power button to shut it down completely. Do not save files or attempt a proper shutdown.
- Unplug all devices: Disconnect the charger, USB drives, and any peripherals to prevent electrical shorts.
- Remove the battery: If your laptop has a removable battery, take it out carefully.
- Wipe excess liquid: Use a dry cloth or paper towel to absorb as much liquid as possible from the surface.
- Position the laptop: Place it upside down in a tent-like shape to let gravity drain liquid away from internal components.
These steps reduce the risk of short circuits and prepare the laptop for deeper cleaning. However, avoid using the device until you’ve completed the full cleaning process to prevent further damage.
Assessing the Damage
Before cleaning the motherboard, evaluate the extent of the spill. Different liquids cause varying levels of damage. Water is less harmful but can still cause corrosion over time. Sugary drinks like soda or juice are more dangerous, as they leave sticky residues that can damage circuits. Additionally, assess which areas were affected, such as the keyboard, touchpad, or ports. If the liquid reached the motherboard, cleaning it thoroughly is crucial to prevent long-term issues like corrosion or component failure.
Tools and Materials Needed
To clean a laptop motherboard safely, gather the following tools and materials:
- Isopropyl alcohol (90% or higher): Dissolves residues and evaporates quickly without leaving moisture.
- Soft-bristled brush: A clean toothbrush or electronics brush for scrubbing delicate areas.
- Microfiber cloth: For wiping surfaces without scratching.
- Compressed air: To blow out dust and liquid from tight spaces.
- Screwdrivers: Precision screwdrivers (usually Phillips) to open the laptop.
- Cotton swabs: For precise cleaning of small components.
- Plastic spudger: To safely pry open the laptop without damaging parts.
Ensure you work in a clean, well-lit, and static-free environment. Consider using an anti-static wrist strap to protect sensitive components from electrostatic discharge.
Step-by-Step Guide to Cleaning the Motherboard
Once you’ve gathered your tools, follow these steps to clean the motherboard effectively. This process requires patience and precision, so take your time to avoid mistakes.
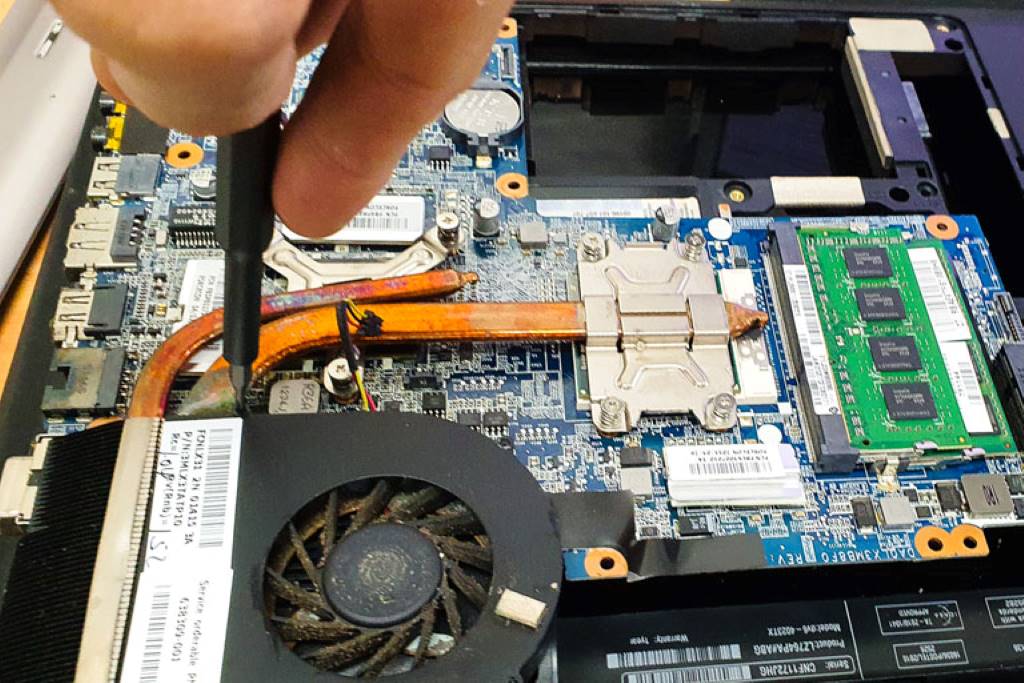
Step 1: Disassemble the Laptop
Turn off and unplug the laptop, then remove the back panel. Refer to your laptop’s manual or a trusted resource like iFixit for model-specific disassembly instructions. Carefully remove the battery, hard drive, RAM, and other components to access the motherboard. Take photos during disassembly to help with reassembly later. Place screws and components in organized containers to avoid losing them.
Step 2: Inspect the Motherboard
Examine the motherboard for visible signs of liquid damage, such as wet spots, corrosion (green or white residue), or sticky areas. Pay attention to connectors, capacitors, and solder joints. If you notice severe damage, such as burnt components, consult a professional technician, as cleaning alone may not suffice.
Step 3: Clean with Isopropyl Alcohol
Dip a soft-bristled brush or cotton swab in isopropyl alcohol (90% or higher). Gently scrub the affected areas of the motherboard, focusing on sticky or corroded spots. Use small, controlled motions to avoid damaging delicate components. For tight spaces, use compressed air to dislodge debris, then clean with alcohol-soaked swabs. Avoid soaking the motherboard; a small amount of alcohol is sufficient.
Step 4: Dry the Motherboard
After cleaning, let the motherboard air-dry for at least 24 hours in a well-ventilated area. Do not use a hairdryer or oven, as heat can damage components. To speed up drying, place the motherboard near a fan or in a bag of uncooked rice to absorb residual moisture. Ensure no liquid remains before proceeding.
Step 5: Reassemble and Test
Once dry, reassemble the laptop by reversing the disassembly steps. Refer to your photos to ensure correct placement of components. Power on the laptop and check for functionality. Test the keyboard, touchpad, and other components. If issues persist, such as the aspire 3 touchpad not working, further troubleshooting or professional repair may be needed.
Preventing Future Spills
To avoid future liquid damage, consider these preventive measures:
- Use a keyboard cover: Protects the keyboard and underlying components from spills.
- Keep liquids away: Avoid placing drinks near your laptop.
- Invest in a spill-resistant laptop: Some models offer better protection against liquid damage.
- Regular maintenance: Clean your laptop periodically to remove dust and prevent overheating.
Implementing these habits can extend your laptop’s lifespan and reduce the risk of costly repairs.
Discover now:
How to Recover Your Forgotten Wi-Fi Password
How to Secure IoT Devices on Your Home Network
When to Seek Professional Help
If the motherboard shows signs of severe corrosion, burnt components, or persistent issues after cleaning, consult a professional. Attempting to repair complex damage without expertise can worsen the problem. Reputable repair services, such as those listed on Laptop Mag, can diagnose and fix issues beyond basic cleaning. Additionally, if you’re uncomfortable disassembling your laptop, a technician can handle the process safely.
FAQs
What liquids are most dangerous for a laptop motherboard?
Sugary drinks, alcohol, and corrosive liquids like juice or soda are the most damaging, as they leave residues that cause corrosion. Water is less harmful but can still lead to short circuits if not dried properly.
Can I use water to clean a laptop motherboard?
No, water can cause further damage and corrosion. Use isopropyl alcohol (90% or higher) as it evaporates quickly and removes residues effectively.
How long should I let the motherboard dry after cleaning?
Allow at least 24 hours for air-drying in a well-ventilated area. Using rice or a fan can help, but avoid heat sources like hairdryers.
What should I do if my laptop doesn’t work after cleaning?
Check all connections during reassembly. If issues persist, such as the aspire 3 touchpad not working, consult a professional technician for further diagnostics.
Can I prevent motherboard damage after a spill?
Acting quickly by powering off, removing the battery, and drying the laptop can minimize damage. However, cleaning the motherboard thoroughly is essential to prevent long-term corrosion.
Conclusion
Cleaning a laptop motherboard after a liquid spill is a delicate but manageable process if done correctly. By acting quickly, using the right tools, and following a careful cleaning process, you can often restore your laptop to full functionality. However, if you encounter persistent issues or severe damage, seeking professional help is the best course of action. With proper care and preventive measures, you can protect your laptop from future spills and extend its lifespan.
Read More: Cleaning tips for a laptop for every user https://ltechuk.com/clean-laptop-without-damaging/
Sorry, the comment form is closed at this time.